Friday, June 18, 2010

CSA Adventures

Community supported agriculture, or CSA, is a great option if you want to decrease your food footprint and eat locally or if you just want to increase the amount and variety of fruits and vegetables in your life. In short, membership in a CSA gets you a big box of fresh-from-the-farm veggies either every week or every other week. Here in Madison, there are quite a few local farms that sell memberships to their CSA program, and most health insurance plans will partially reimburse you for the price. It's a good deal, and it's my first year taking advantage of it.

My first box came with some delicious stuff: green garlic, asparagus, and parsley...

... big long stalks of rhubarb,

... a bunch of beautiful bright red radishes,

... and, here, already wrapped, a head of lettuce and a large bunch of arugula.

Now these ingredients went into a lot of dishes, but the first thing I made (using three of my veggies) was a delicious pancetta asparagus quiche. I luckily had a half-recipe of pie dough in my freezer, so this quiche came together quickly. And the quiche went into our stomachs even more quickly. I had forgotten how a little egg and a little gruyere and a little pie crust can turn any vegetables into something rich, delectable, and sinfully good.

Pancetta and Asparagus Quiche
adapted from this recipe at Simply Recipes

Ingredients
1/2 recipe pie dough (I think mine was from the bottom of this recipe)
1 Tbsp olive oil
1 package pancetta cubes
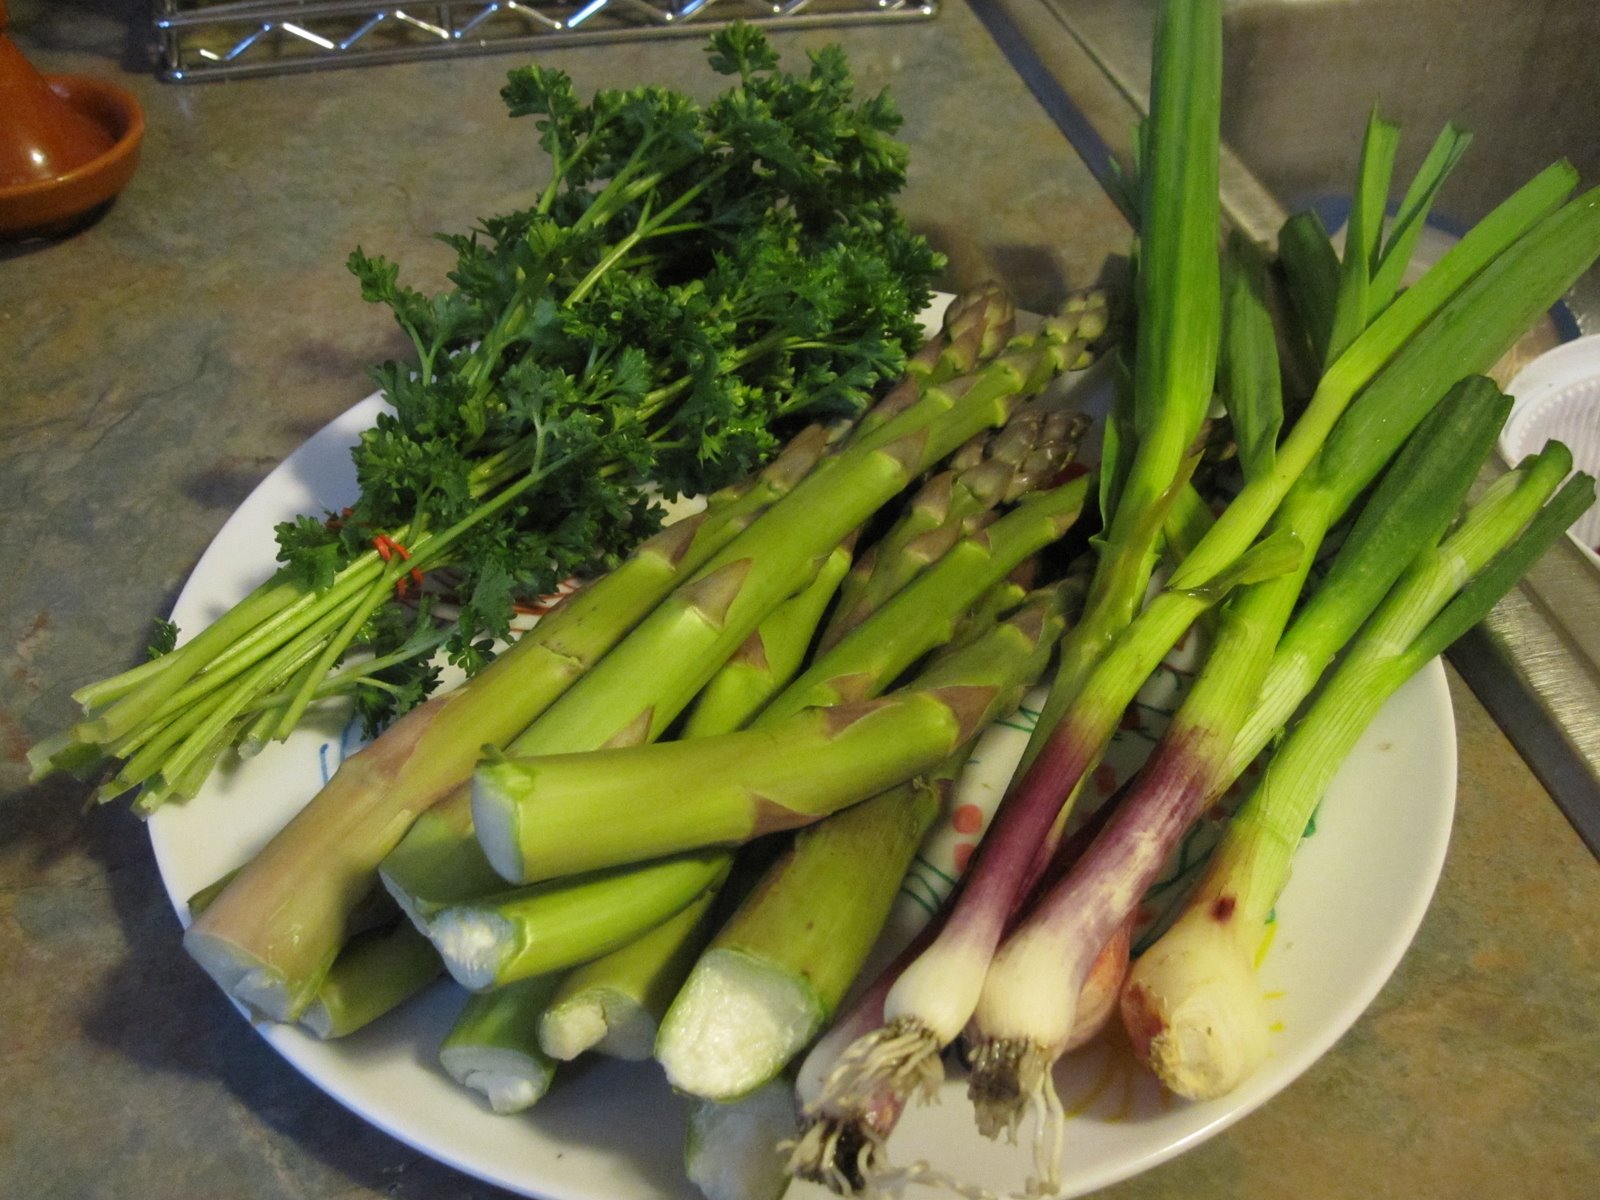
4 stems of green garlic, sliced (or scallions, or 1 shallot)
10 oz asparagus, cut into 1 inch sections
freshly ground pepper
1/2 cup milk
1/2 cup heavy cream
3 large eggs
6 oz gruyere or a mix of gruyere and swiss cheese, grated (1 1/2 cups)

Directions
1. Preheat oven to 350 degrees. On a lightly floured surface, roll out the pie dough into a 11 inch circle. Fit into a 10 inch pie plate and press it into place. Trim the edges.
2. Place a large sheet of aluminum foil or parchment paper over the crust, and fill with dry beans, dry rice, or aluminum pie weights. Bake for 15 minutes. Remove from the oven, and carefully remove the foil or paper with the weights. Using a fork, poke the pie crust multiple times, and return to the oven to bake for another 10 minutes (or until lightly golden). Set aside to cool while preparing the filling.
3. Heat oil at medium-high in a large skillet. Cook pancetta until crisp. Remove to a small bowl. Add green garlic and cook for 3 minutes, until translucent and tender. Remove to the pancetta bowl. Add asparagus and cook for 5 minutes. Pour in a little water (to just cover the bottom of the pan) and cover. Cook for 3 more minutes, remove the lid and finish cooking until the water is gone.
4. Increase the oven temperature to 375 degrees. Place the pie pan on a baking sheet to catch any spills or overflow. Sprinkle half of the cheese onto the crust and top with the asparagus, pancetta, and garlic. Sprinkle the rest of the cheese on a top.
5. In a medium bowl, whisk together the milk, cream, eggs, and pepper. Pour over the filling. Transfer the baking sheet and quiche to the oven and bake until it is set in the center, 30 to 35 minutes. Allow to cool for 10 minutes before slicing.

Posted by Picasa

Wednesday, June 16, 2010

Potluck 4/22: Mad Scientists

While I was in Seattle listening to talks about plasma, it was decided that I should host potluck the day after I returned. Since my brain was pretty geared towards science, I figured it was about time to have a mad scientist potluck, filled with (possibly) science-themed food. Or at least food that we can experimentally prove tastes delicious.

First things first: any good science party needs a genuine science experiment. And since I like my rented microwave too much to make grape plasma in it, I went with the always popular non-Newtonian fluid: corn starch and water. What I mean by non-Newtonian is this - this mixture will feel like a liquid (like white glue) if you touch it slowly, not putting a lot of force on it, but it will feel more solid (like thick, wet sand) if you poke it quickly. Lana and Laura demonstrate...
Later on in the evening I demonstrated that it could be rolled (with a fast, constant motion) into a ball, which I then threw against the outside of the house. It stayed ball-shaped and hard for long enough to slam into the wall and fall to the ground, but then it melted like the Wicked Witch of the West, slipping through the cracks on the deck.

Another science project that I provided was savory molecules. Cherry tomatoes, basil, mozzarella balls, and chunks of carrot took the place of hydrogen, oxygen, and other atoms in some complex molecules, made by Aditya. I think here we have caffeine and one other one. What can I say, chemistry has never been my thing.

I did take solid state physics, though, so I am a pro (ha! not really...) at crystalline structures such as the ever-popular "body centered cubic" shown below.

Lana took a more zoological approach, with her dog (neck-less giraffe?) figure, seen below with some H2O and balsamic vinaigrette.


Every scientist needs a little liquid inspiration, which Mike so boldly provided.

Geoffrey and Laura provided nourishment in the form of delicious peanut and potato stew. Just looking at this picture makes me salivate like Pavlov's dog.


My final contribution was, naturally, a dessert. The end result was not particularly science-y, but I do find the transformation of the ingredients to be a testament to kitchen science. Because, let's face it, a plain mixture of lemon juice, eggs, and whipping cream doesn't sound all that appetizing.


But add a little sugar, heat, and lots of whisking, and you end up with lemon mousse: rich and fluffy, with a flavor like lemon drops. Now that is a good use of science. And here's the recipe!

Lemon Mousse
from The Amateur Gourmet

Ingredients
2 egg yolks
1 whole egg
2 lemons
1/3 cup sugar
3/4 cup heavy cream

Directions
1. Start a pot filled 1/4 of the way with water boiling on the stove. In a bowl, roughly whisk together the egg yolks, whole egg, sugar, and the grated peel and juice of the lemons. Prepare a larger bowl with ice cubes and cold water.
2. Place the bowl with the egg mixture over the boiling water (taking care that the bottom doesn't touch the water), and whisk until the mixture thickens to the consistency of cake batter.
3. Move the bowl with the egg mixture to the ice-water bath, and whisk occasionally until it cools to room temperature. Meanwhile, use a hand-held mixer to whip the cream (along with a pinch of sugar) until you have stiff-ish peaks.
4. Whisk 1/3 of the whipped cream into the lemon curd. Gently fold in the remaining whipped cream with a spatula, until no streaks of pure lemon curd remain. Chill until you're ready to devour it.

Posted by Picasa